Integration
Cart Checkbox Configuration
When the plugin has been initialized, you can add it to your theme so that Hipli is offered to your customers via the cart. To do this, click on the Add to theme button.

You clicked on the Add to theme button and arrived on this page:
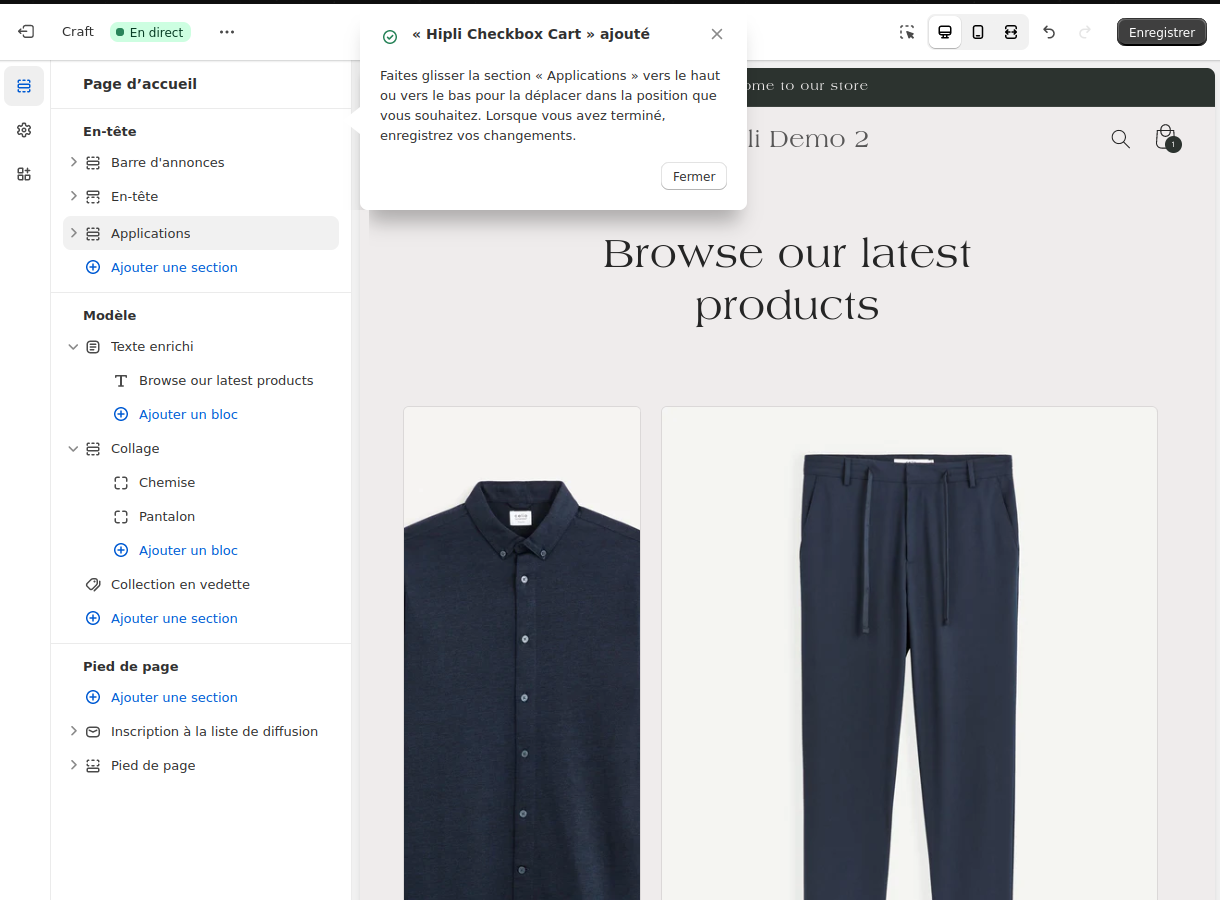

Hipli has been added to the theme, but as the message indicates, you have a minimal configuration to do. Click on the arrow to the left of App (of course the arrow and not the text)
If you encountered an error during the addition, you can consult the FAQ
You should have this:
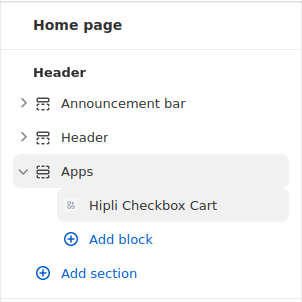
Then you can click on Hipli Checkbox Cart
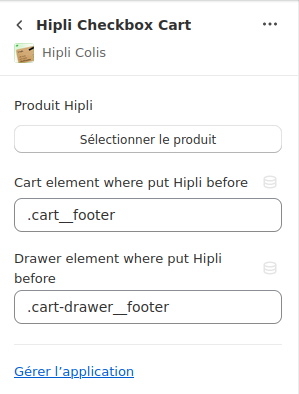
You have a Select product button, click on it and choose the Hipli product. If everything is good, the product is displayed and the message on the demo page disappears.
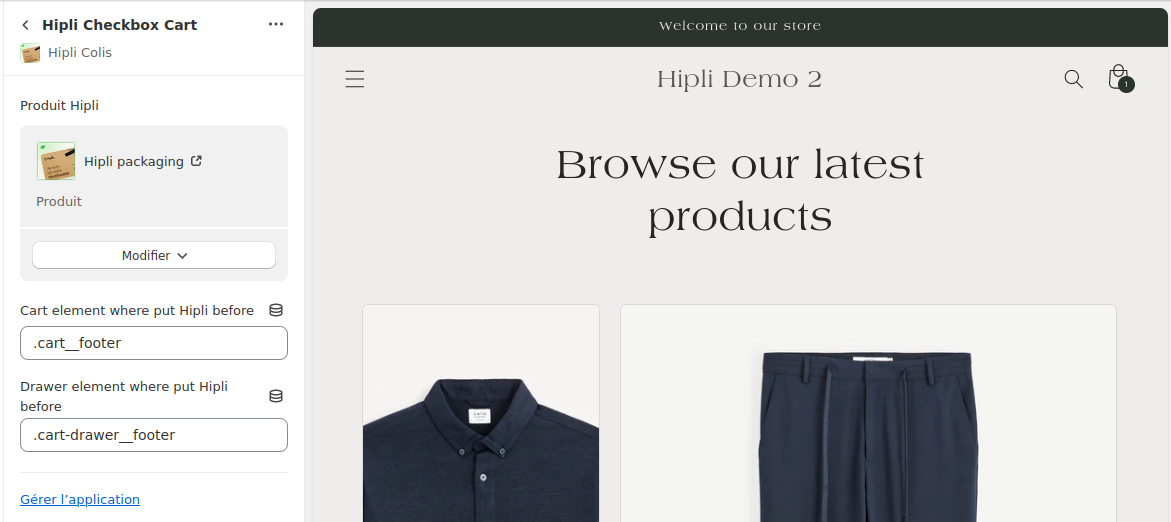
You can click on the button at the top right Save
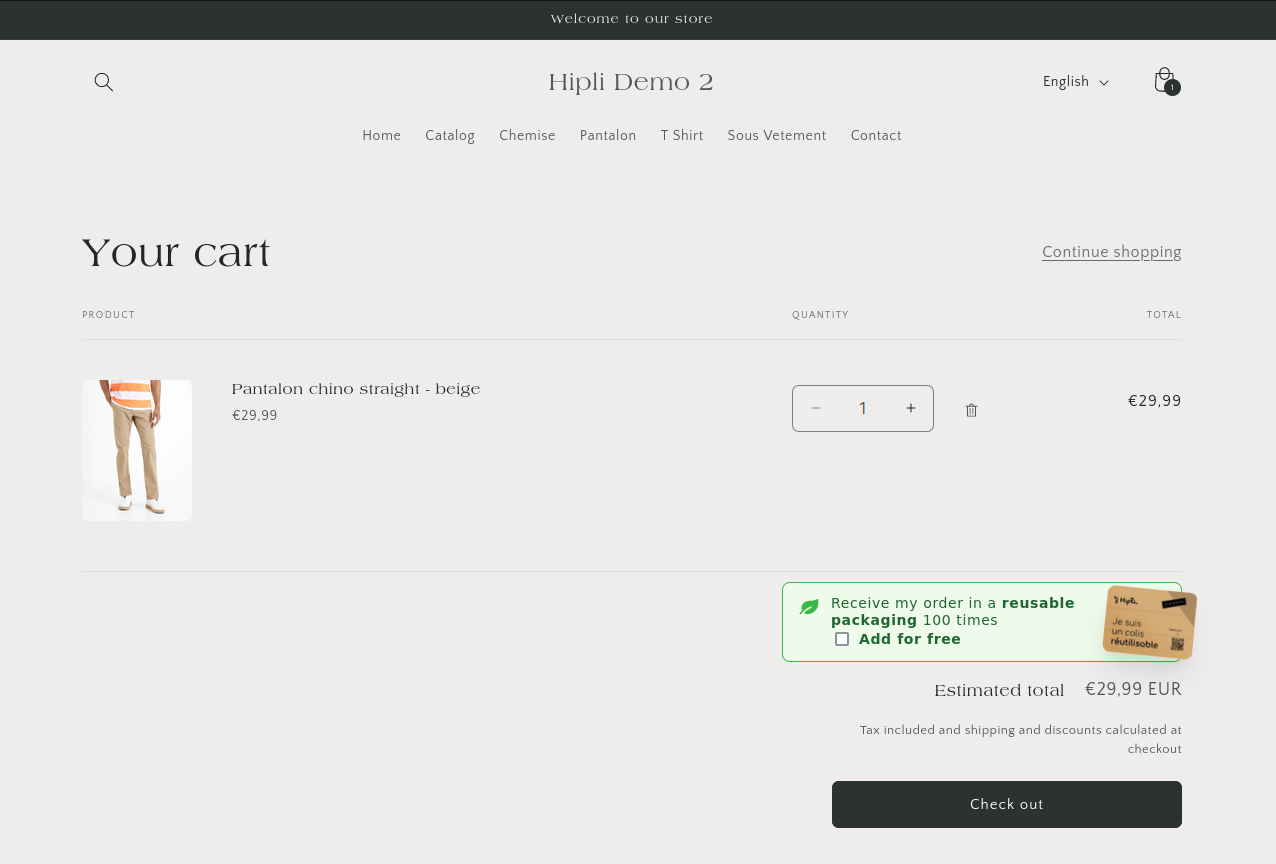
If you are using a theme close to Shopify's native themes, everything should work. You can click on the cart to verify this:
Marker Configuration
You can also add a marker on your product page to indicate to your customers that the product they are looking at is compatible with the Hipli package. To do this, click on the Add Marker button.

You clicked on the Add Marker button and arrived on this page:
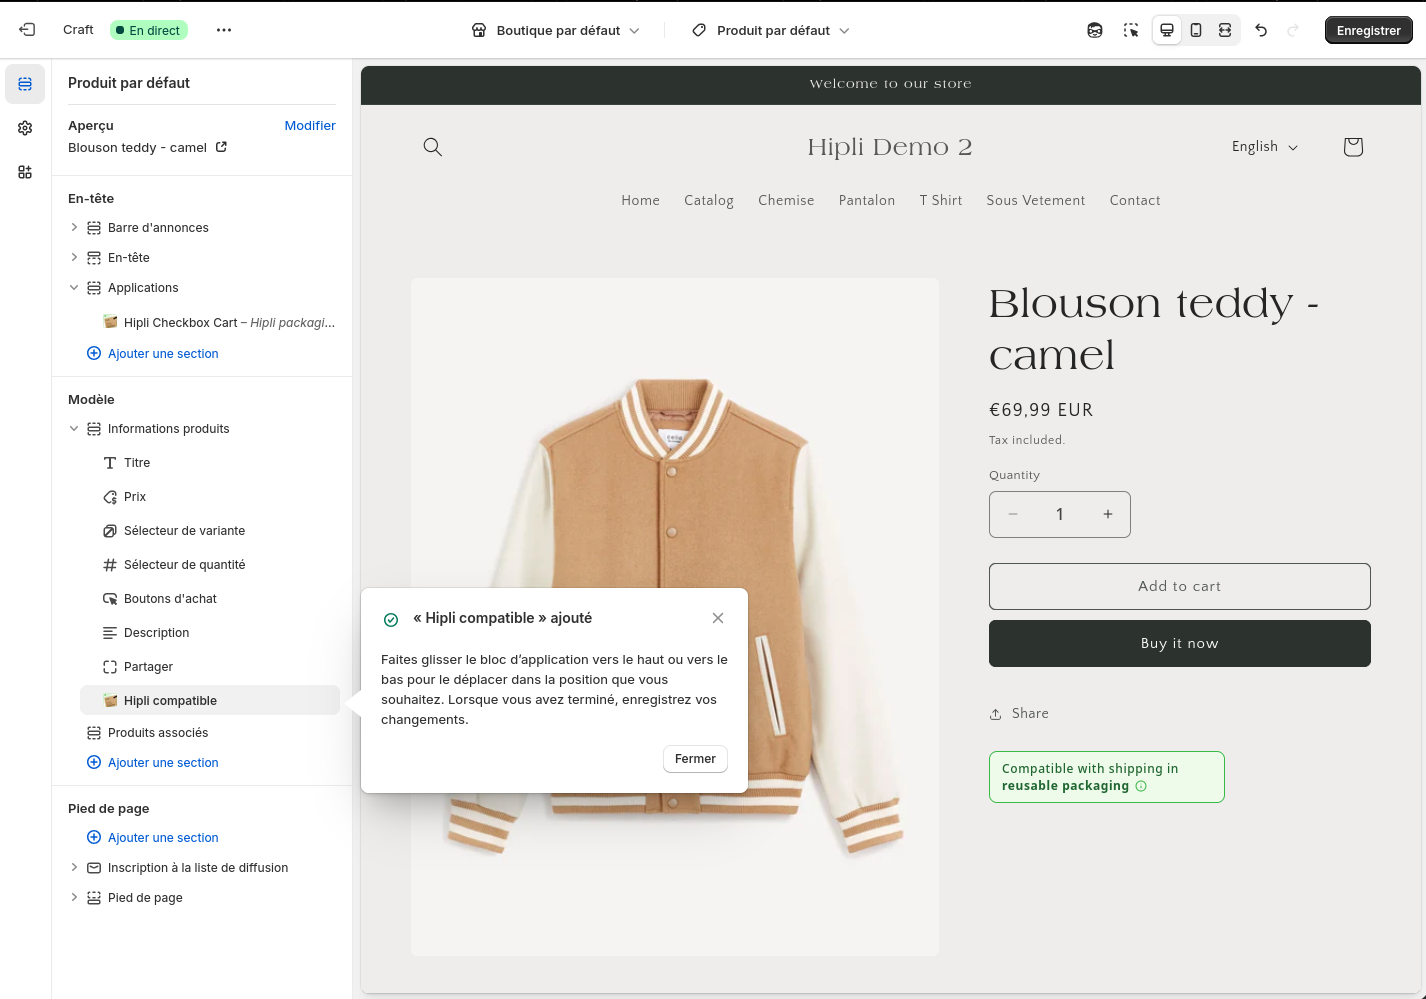
The marker has been added to the product page, but probably not in the desired location...
Drag the rightmost button of Hipli-compatible that appears when hovering over the line.
You should have this:
Then, you can release when the button seems to be in the best location. The page will refresh when you release the click.
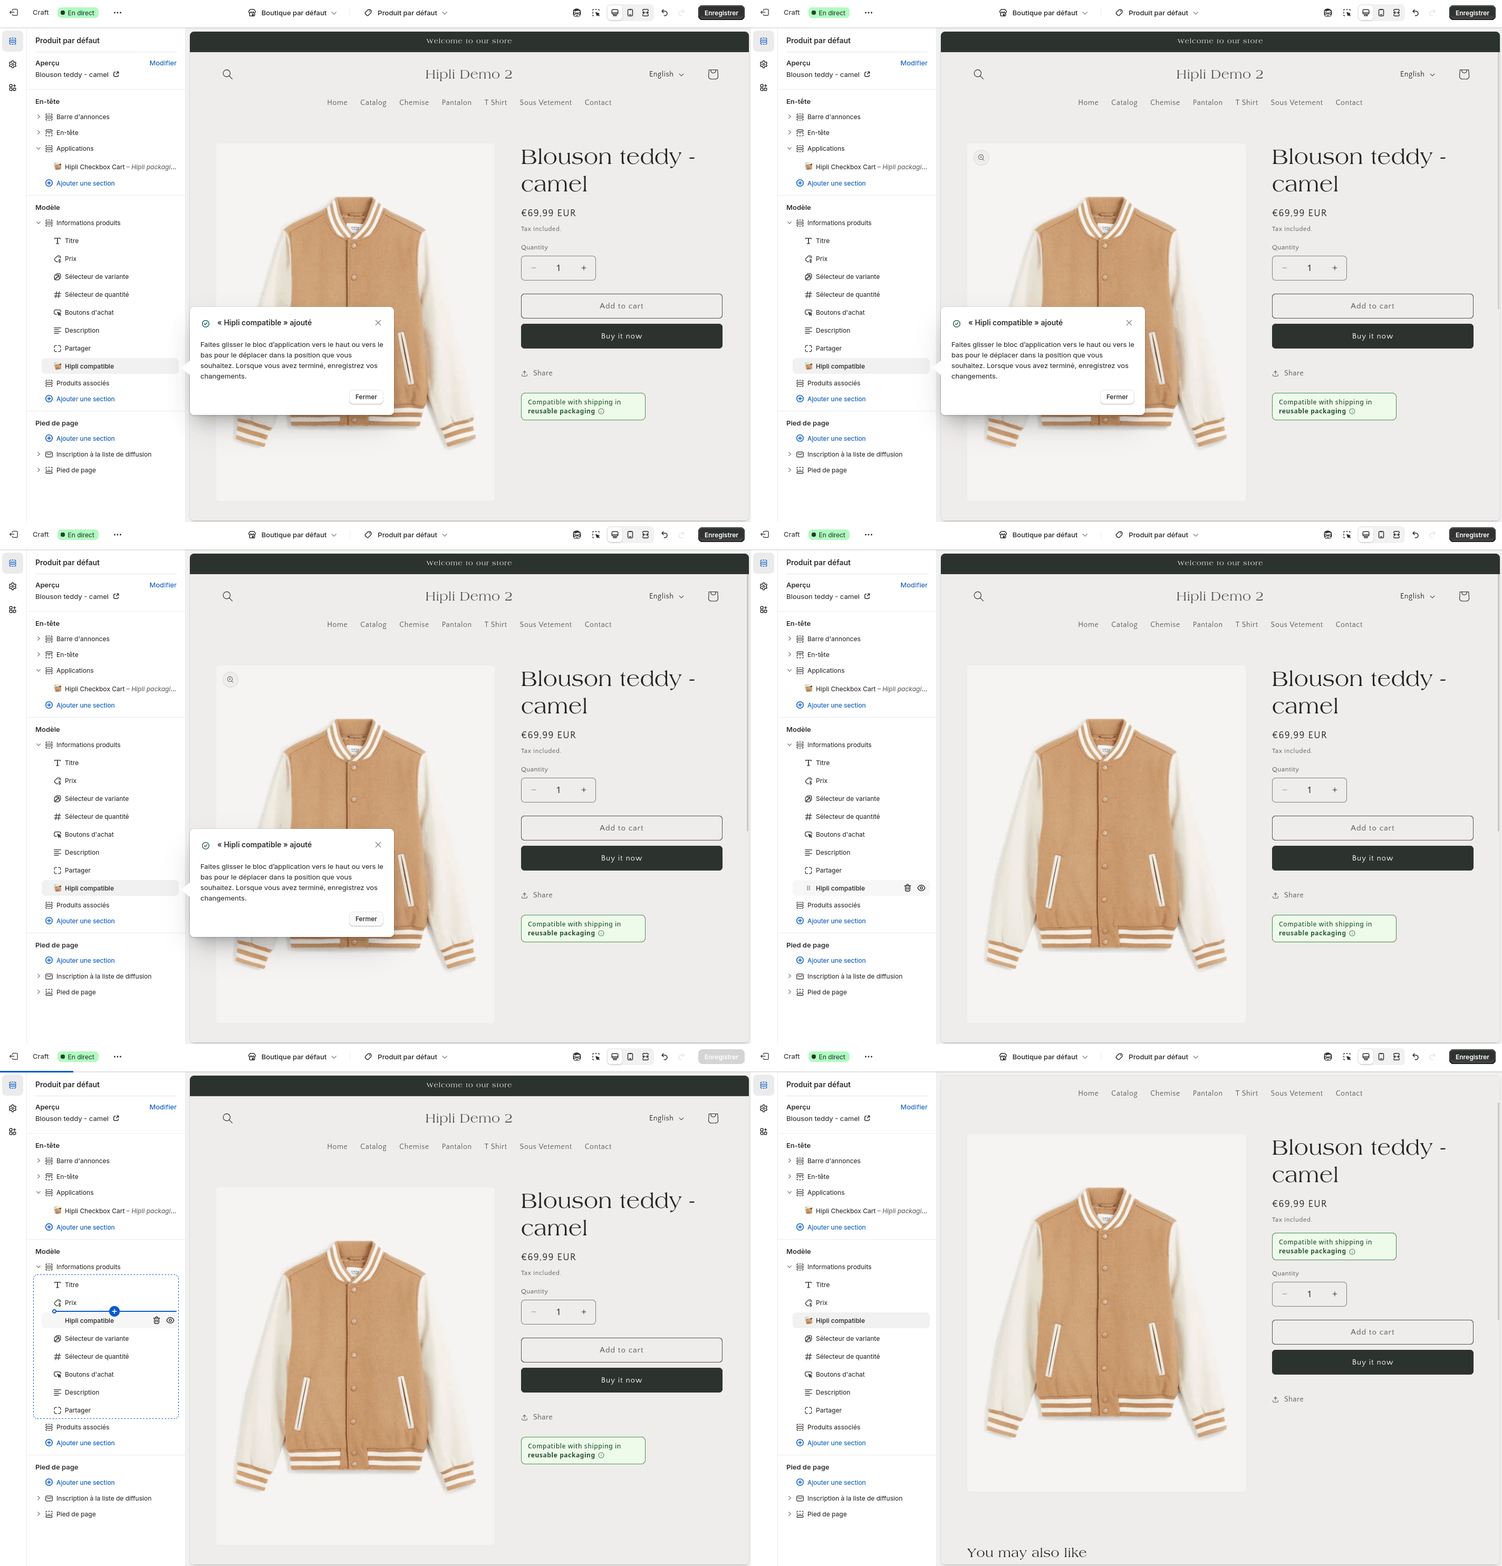
And voila, the marker is placed!
Shopify plus Configuration
If you have a Shopify plus subscription, you have access to additional features. You can integrate Shopify into the payment phase.
You need to go to the theme editor to add Hipli to the payment phase. To do this, click on the Themes button in the left sidebar of your store's administration page.
Then click on the Customize button of the theme you want to modify.

Click on the button at the top:
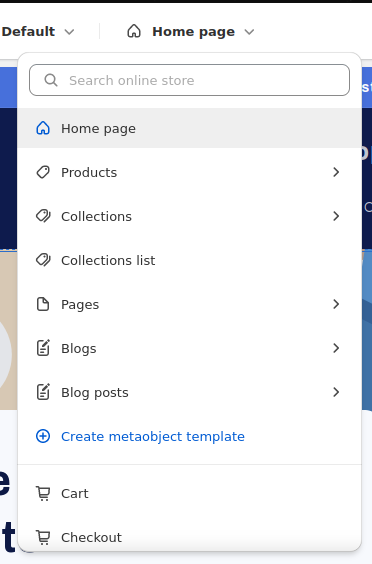
Then on Payment
You should arrive on this page:
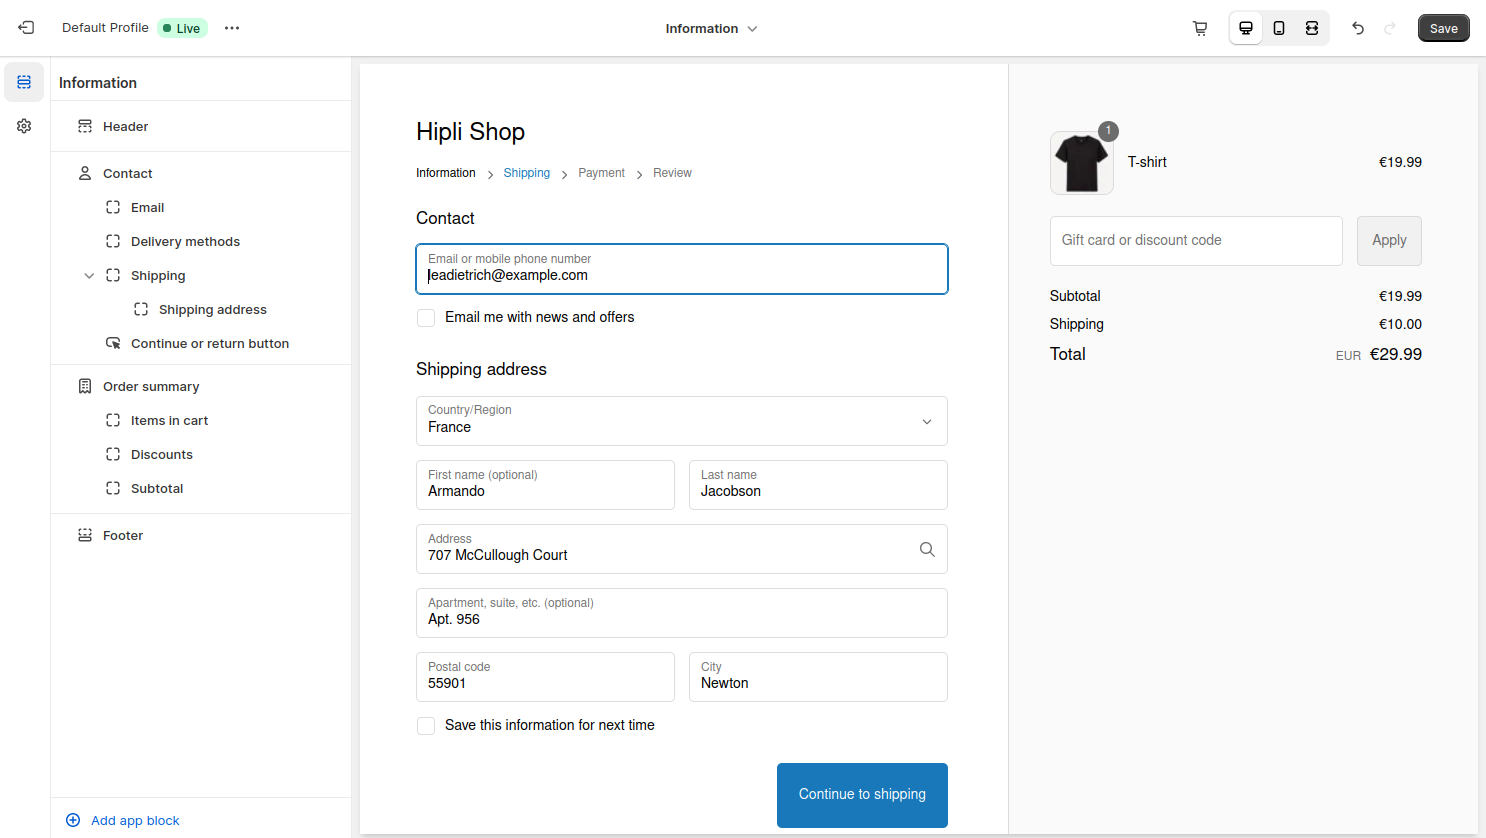
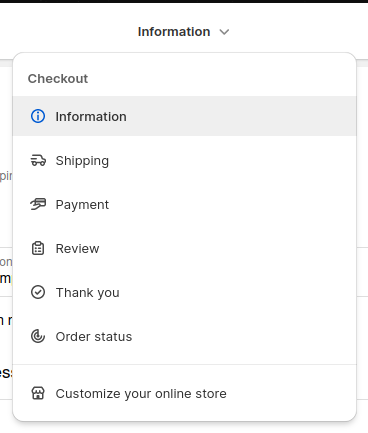
Click on the top menu to go to Shipping
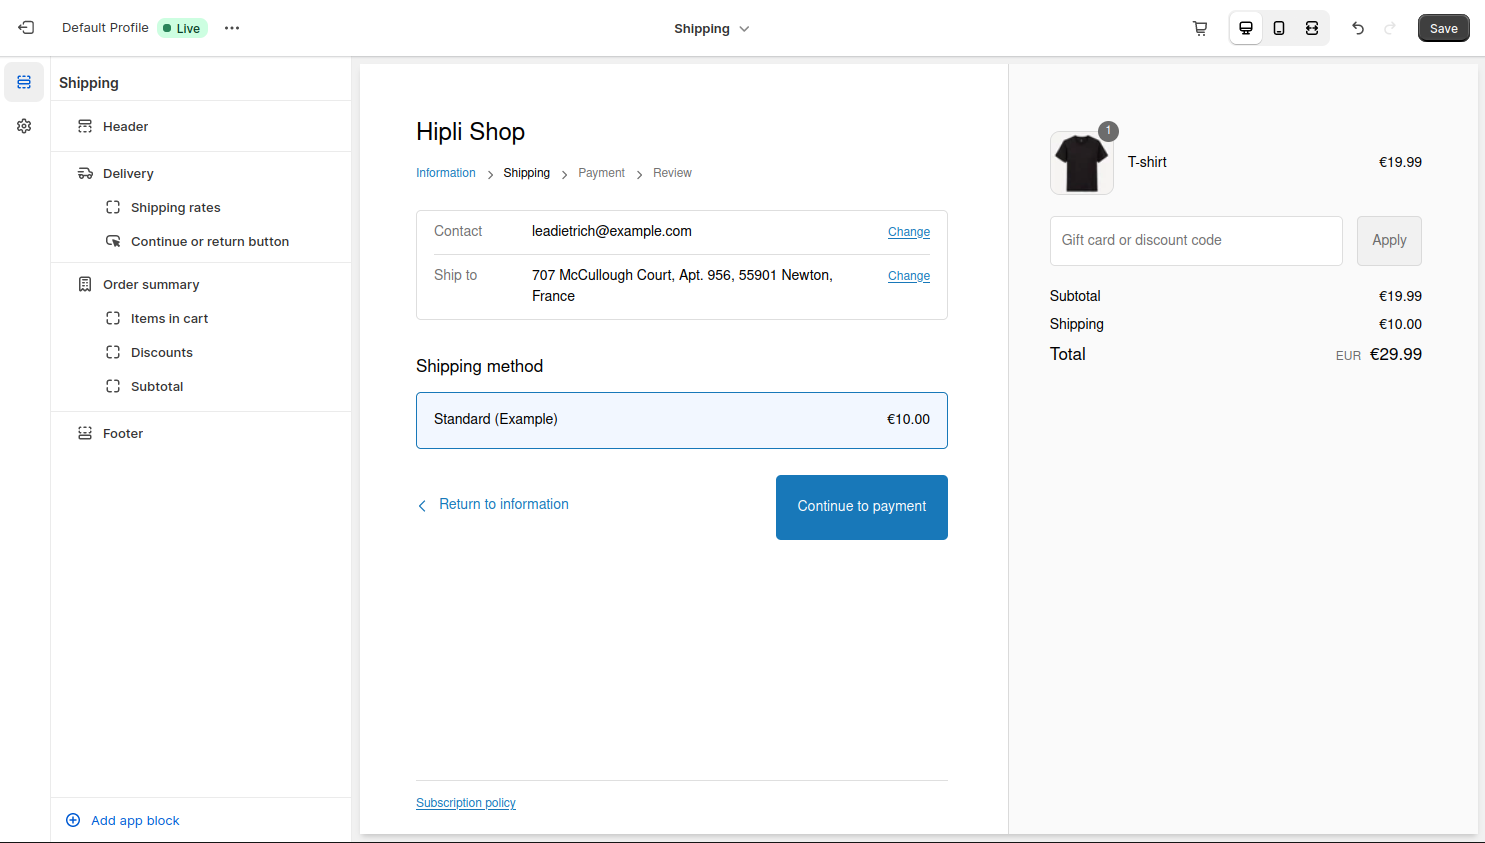
You will be able to click on Add an app block at the bottom left
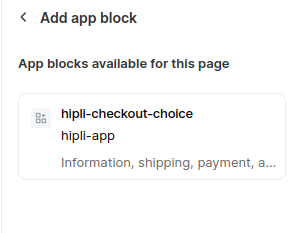
Then on hipli-checkbox-choice
Do it a second time to add the hipli-checkbox-choice block to the side payment page.
You will need to move one of the blocks below Discounts (this is the only other possible location)
You should get this:
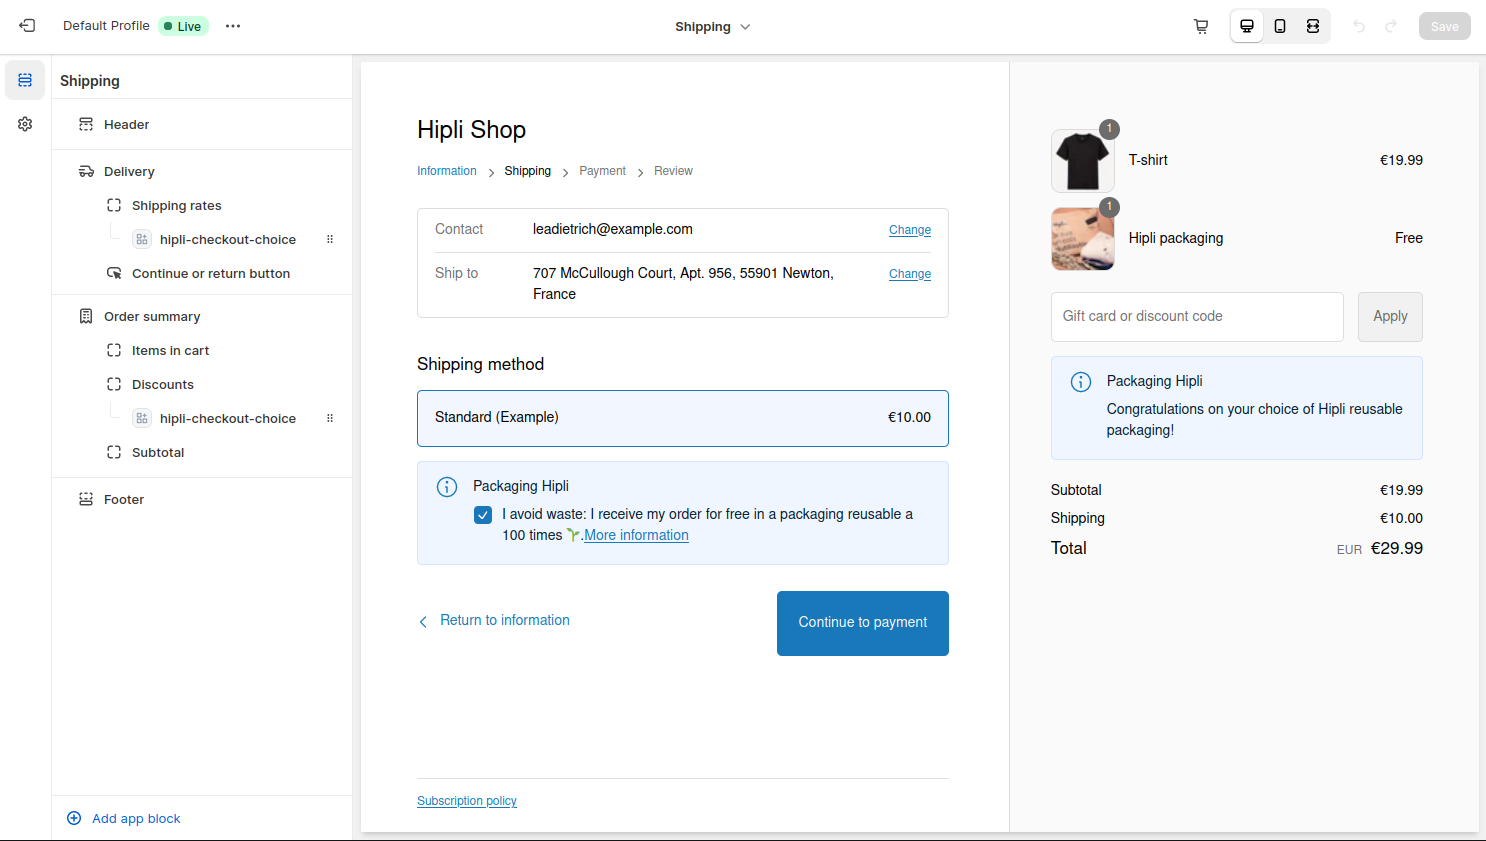
or this if the product used in the demo is not Hipli compatible:
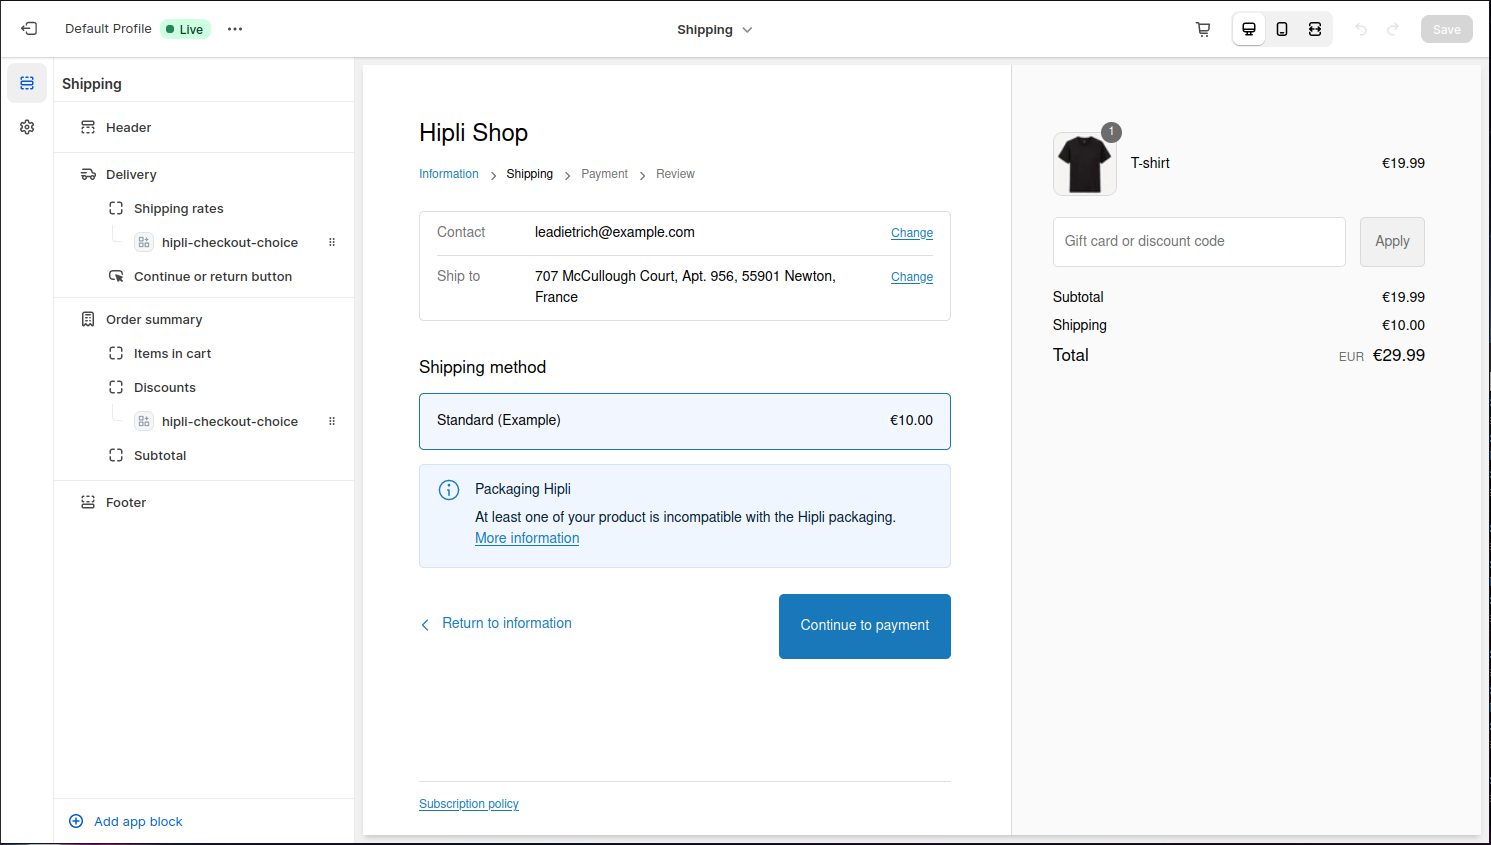
You can click on the Save button at the top right.
Everything is set up for Hipli to be offered to your customers during the payment phase.
Hide Hipli from the product list
When created, the Hipli product is excluded from search. However, it remains accessible in the All products category, which is a default category in Shopify.
It is possible to redefine this category. To do this, click on the Collections button in the left sidebar of your store's administration page.
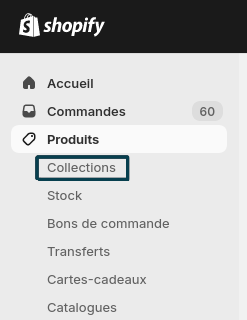
Then click on the Create collection button.
Name the collection all, which will replace the default Shopify collection. Choose Automated as the collection type, and for the condition, choose Product title is not equal to Hipli Packaging.
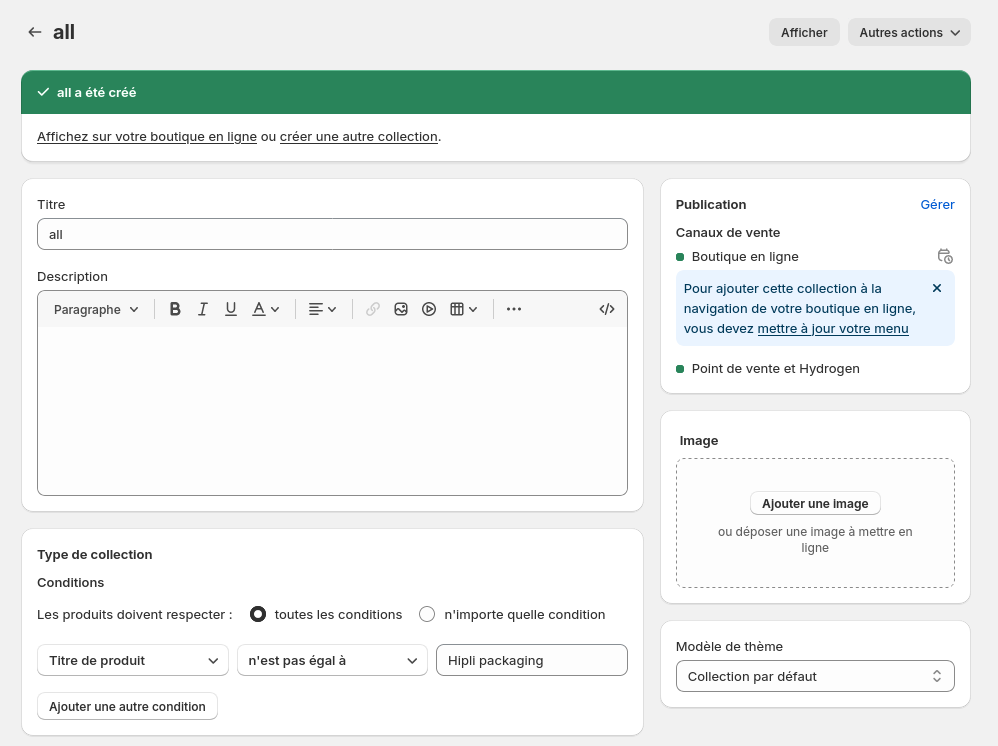
Click the Save button.
From now on, even when accessing the all collection, the Hipli product will not be visible.